
Sado Rabaudi

This tutorial will show you how you can create, run and analyze an eye tracking experiment in VR using SightLab VR. Click here for a video version of this tutorial
Sightlab VR includes a template for setting up eye tracking experiments that can be modified to use your own environment model and fixation objects. These models can be from many sources. See the Vizard documentation for supported model types. One good source for getting 3D models is http://www.sketchfab.com (download as .glTF).
- For more information on Inspector see this page in the Vizard documentation
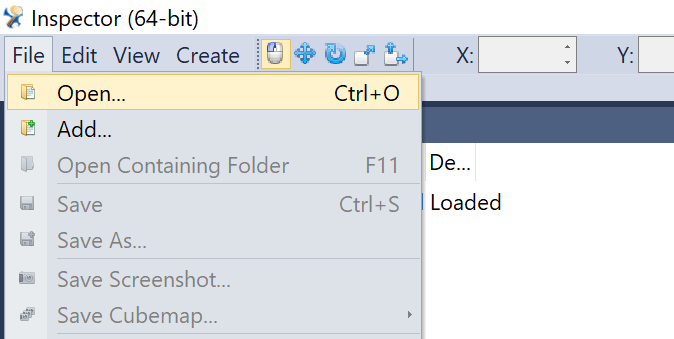
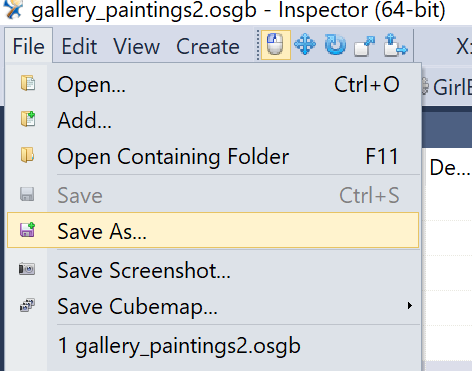
1. Open Inspector (By double clicking the "build.py" file or in Vizard going to Tools- Inspector) and load your environment by choosing File-Open

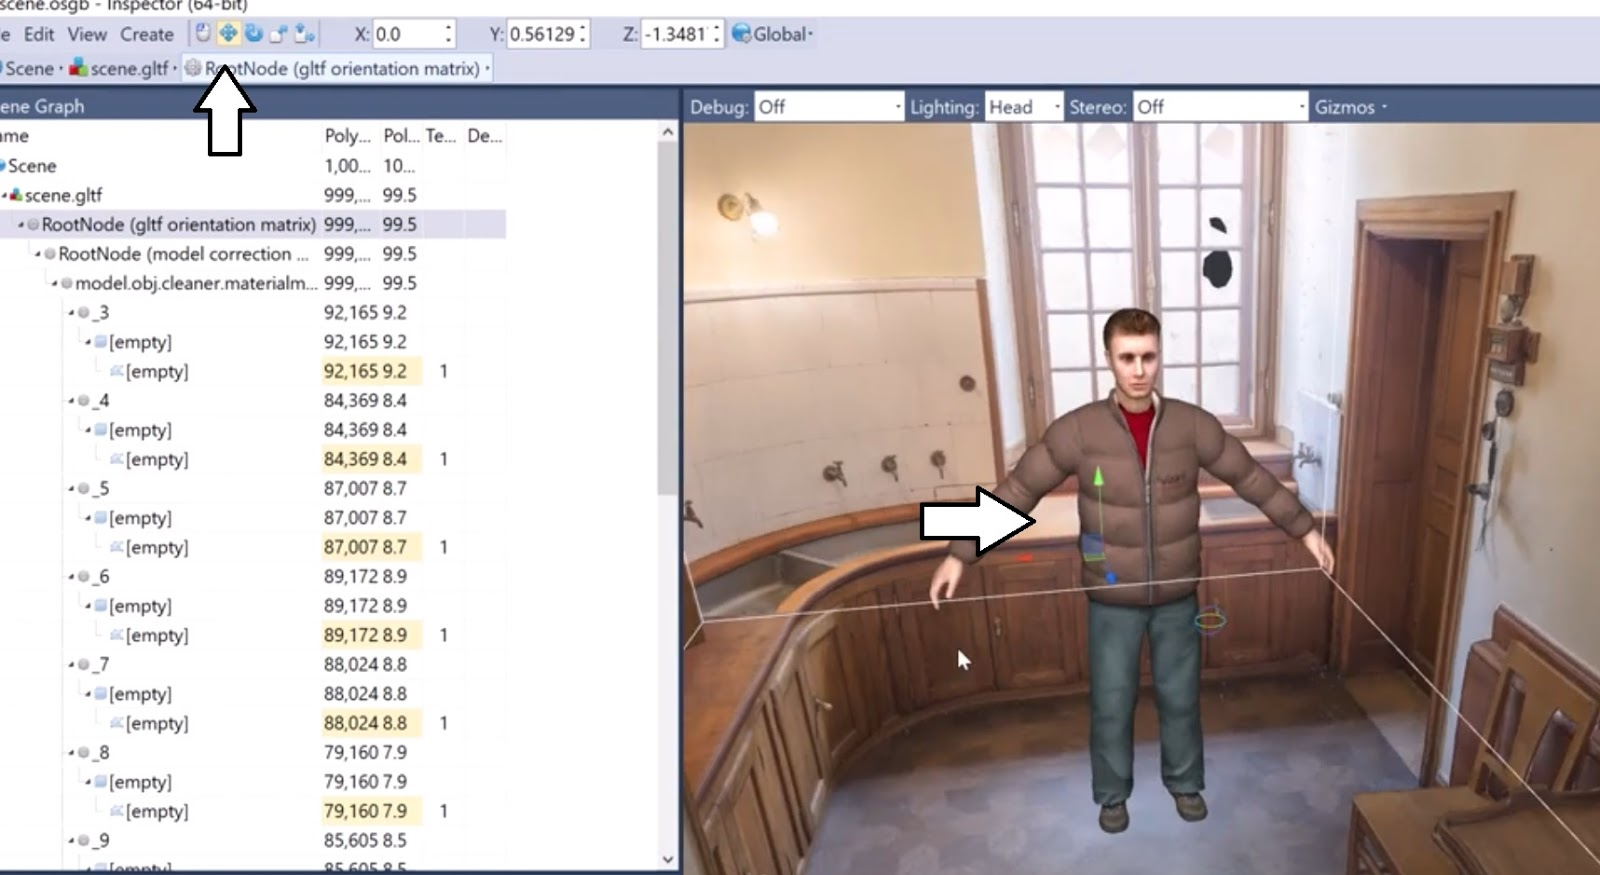
To check the size of your environment, click on the root node in the top left scene graph and look on the bottom right to see the size in meters. You can bring in a stand-in avatar (resources- avatar- vcc_male.cfg) to see where someone would start in the scene and how it looks to scale. To bring down the scale or move the starting point, select the root transform node (gear icon) of the environment (not the avatar) and use the move, scale and rotate tools. For more information on this see this tutorial.

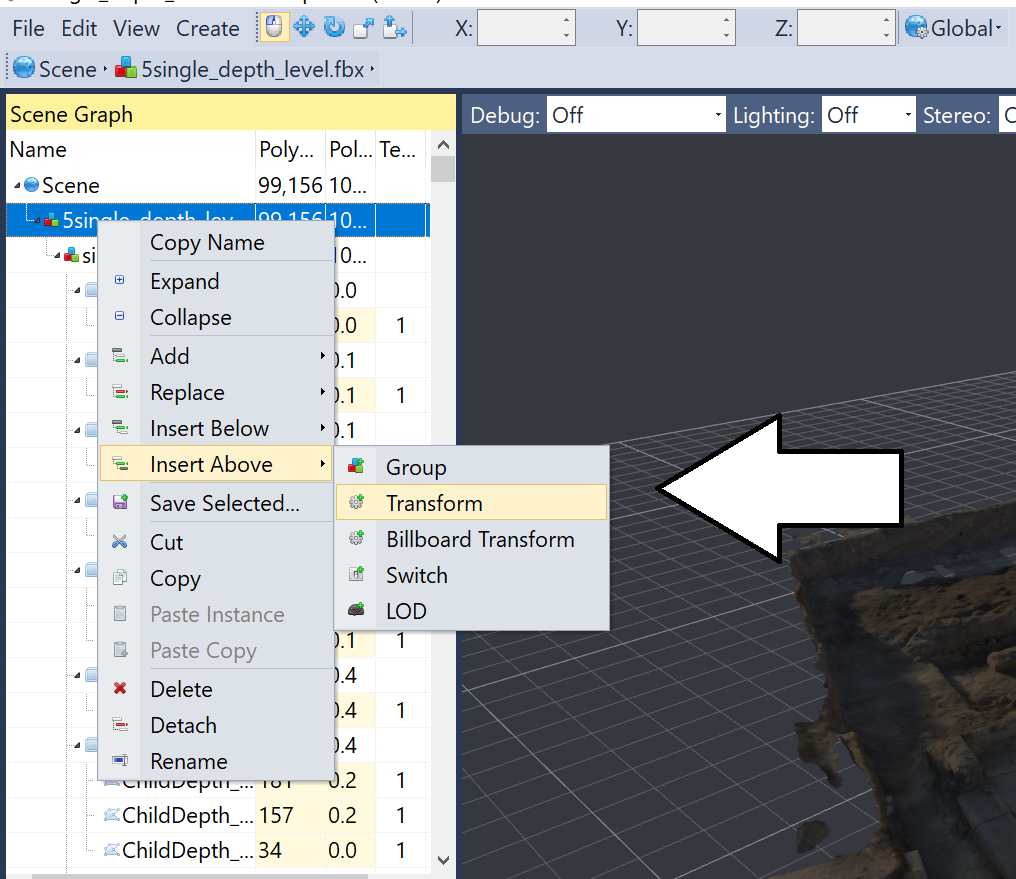
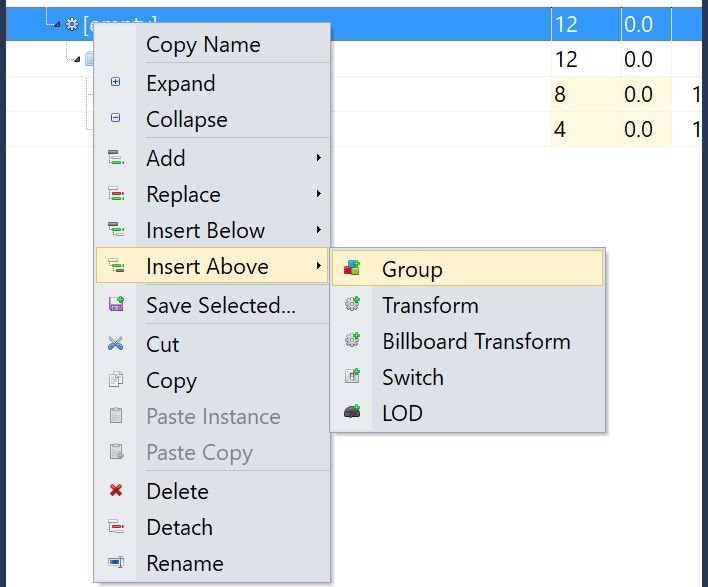
Note: If you don’t see a root transform node you may need to insert one at the top of your scene hierarchy by right clicking and choosing either “insert above” or “insert below”- Transform. You can then select that transform and scale your model.
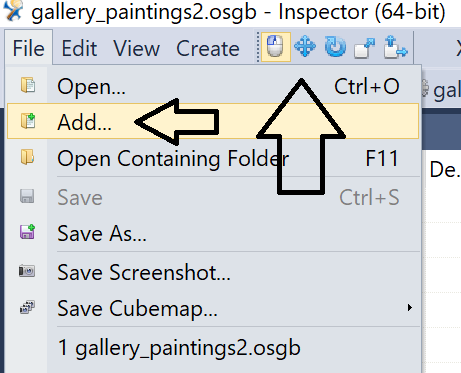
2. If your environment model already includes your fixation objects, then you can skip this step, otherwise, go to File- Add and add objects that you would like to measure eye tracking data on. You can then use the transform tools to position, rotate and scale the object(s).
3. On the left you will see your list of nodes in your scene. The red, blue and green node is a group node. IMPORTANT: This is what is needed to collect data on objects.
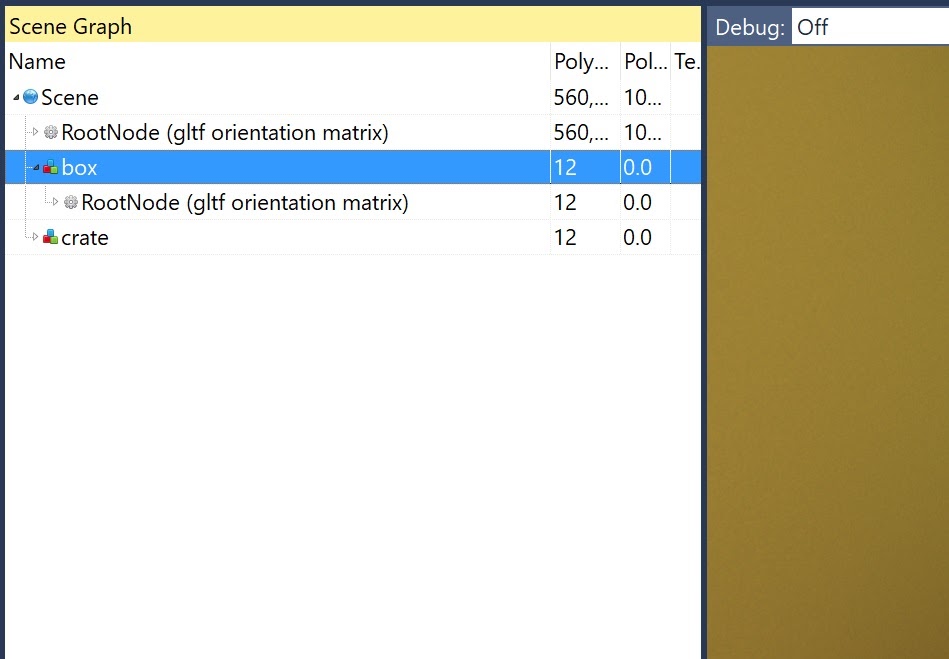
Usually when you add an object it will come in as a group node. If not you will need to right click and select “insert above- group” on any node you wish to add as a fixation object (i.e. objects that will collect and store eye tracking fixation data).
You will also need to add a group node above any objects that are already part of your model that you wish to collect data on.
To move, scale or rotate the objects, click on the transform node (with the gear icon) and use the transform tools. If there is no transform node, right click and choose Insert Above- Transform.
4. Rename the objects by right clicking on the group node and selecting “rename”. (NOTE: It is important that the name of the object is not the same as a name that already exists in the model. It would be good practice to add the tag “_group” next to your objects you want to collect data on.
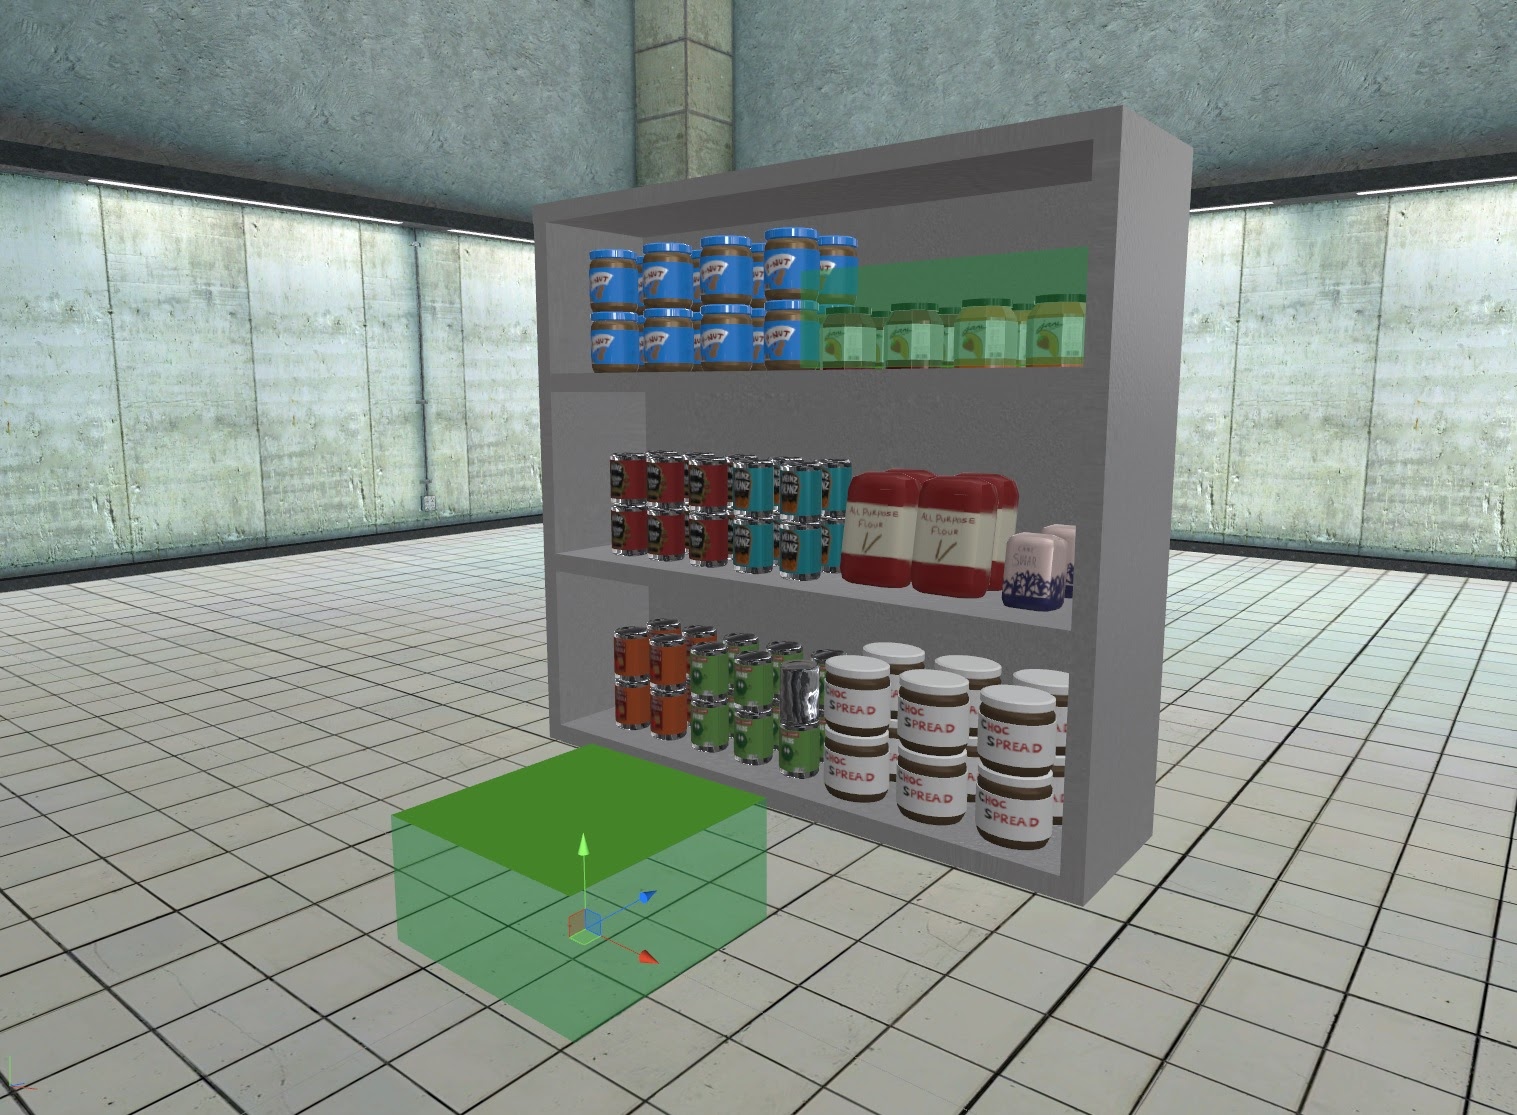
5. To add an area of interest, simply drag in one of the objects labeled as “FixationRegion”, then scale and place it in your scene over an area you want to collect fixations on. You can also right click and rename the area of interest. For having this area not be visible to the user you will then need to go into the code.
In the “experiment” function after yield fadeQuad.fade_out() uncomment out the “fixation region1” by selecting the text and pressing Alt+Shift+3. To add more simply copy and paste the code . Can rename the regions where “Peanut Butter” is the name you gave your region.

Do this for each fixation region you added, and now when you run the scene, fixation data will be collected, but the region will not be seen.
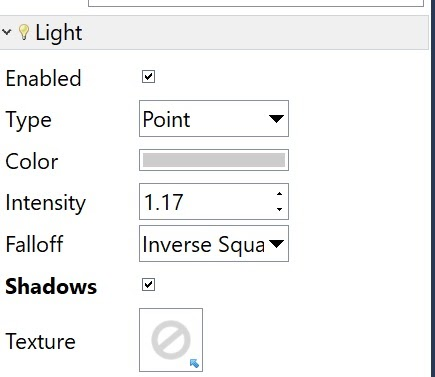
6. You can also add things such as lights, backgrounds and more with Inspector. To add a light, go to Create- Light and choose Directional, Point or Spot Light. Clicking on the light will bring up its attributes on the right.
7. Save this scene to the resources- environment folder in your SightLab installation folder and give your scene a name.
You now have your eye tracking experiment setup to run in your eye tracker of choice and collect data and visualize it.
For setting up an experiment with 360 video or images, simply drop the video or images in the resources/media folder
Run SightLab_VR.py (for scenes with 3D models) or SightLab_VR_360_video_photo.py (for spherical videos and photos) (Note: with SightLab VR regular version, this will be titled “Main.py”)
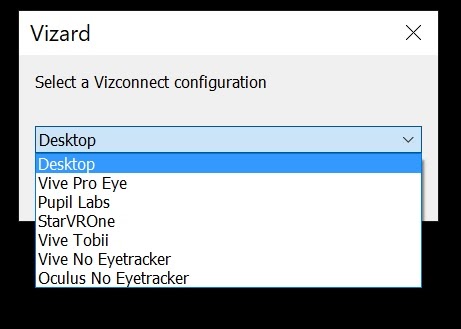
-Choose hardware from various eye tracked headsets, desktop mode or non-eye tracked headsets (head position will be used for analytics of non-eyetracked headsets)
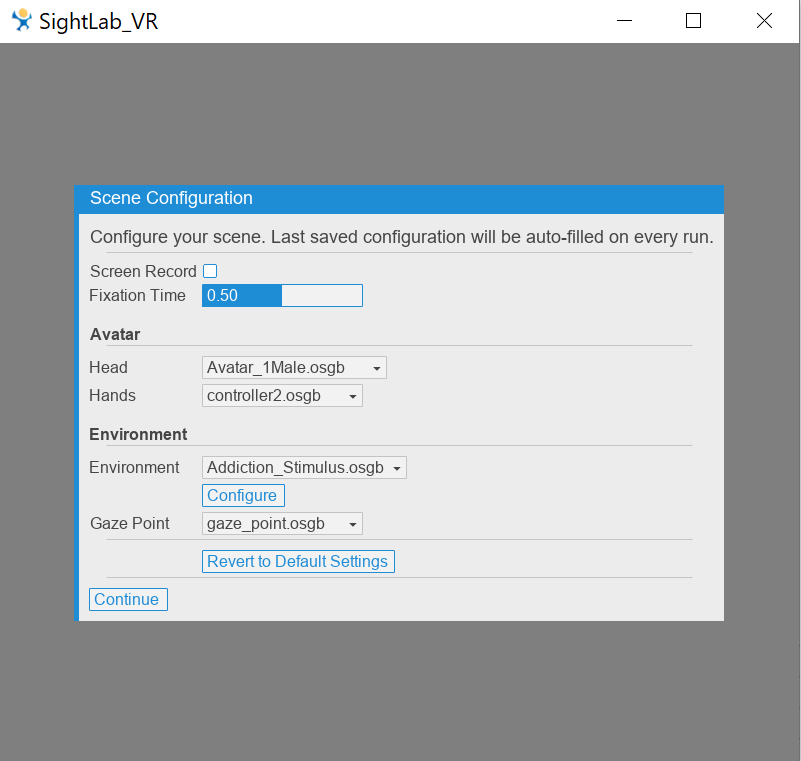
-Configure your options:
SightlabVR.py options:
Screen Record - Will record a video of the session and save it in the “recordings” folder (note: the videos are uncompressed and may take up a lot of hard drive space)
Grabbable Objects - Toggle whether you want to grab the objects in your scene
Fixation Time - Adjust time in milliseconds required for a fixation on an object (default is 500 milliseconds).
Avatar - Choose Head or hands model to use for session replay. Place other hands or head objects in your avatar hands and head folder (in resources) to have them available.
Environment - Choose your environment model you wish to run your session with. Place any additional environment models in the resources- environment folder.
Configure- see below
Gaze Point- Choose the gaze intersect point object
Revert to Default Settings- reverts back to the default settings
Continue- Saves the current configuration and runs the session (last saved configuration will be auto-filled on each run).
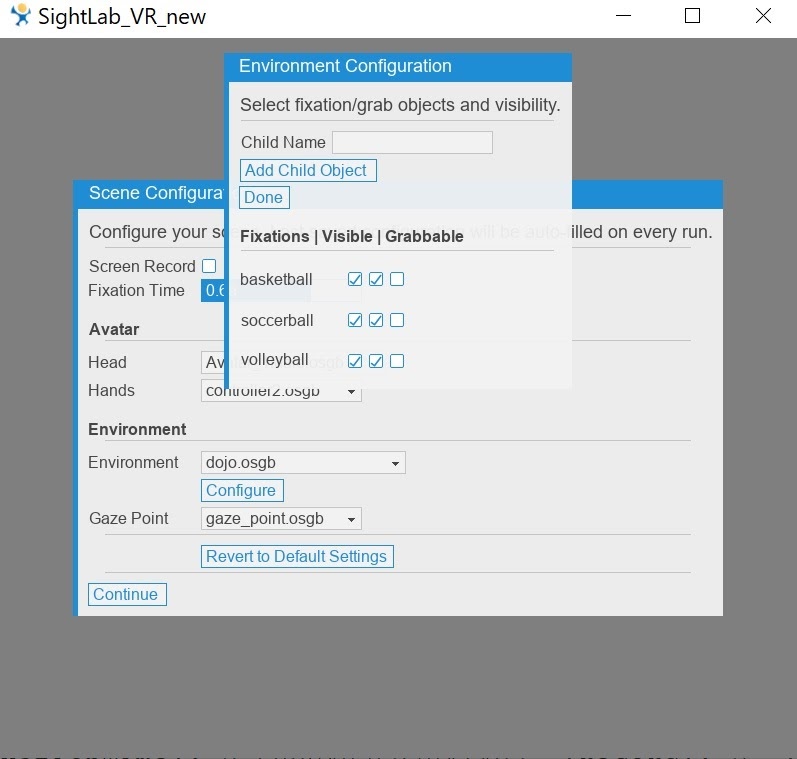
After choosing an environment from the dropdown, press “configure” to choose fixation objects. Check or uncheck the objects you wish to collect data on by switching on or off “Fixations”, choose visibility by choosing “Visible”, to grab certain objects check “Grabbable”. To add an object manually that is in your model, add the name in the “Child Name” section. When finished click “Done”.
SightLab_VR_360_video_photo.py options:
Add any of your own 360 videos or photos to the “media” folder, or use included media
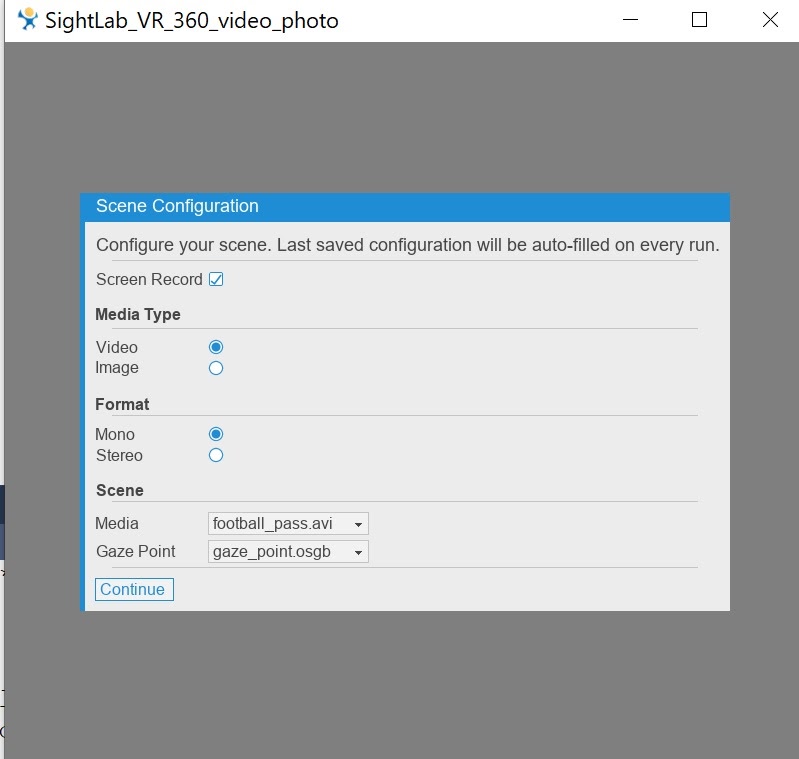
Screen Record - Will record a video of the session and save it in the “recordings” folder (note: the videos are uncompressed and may take up a lot of hard drive space)
Media Type - Choose if using a spherical video or photo
Format - Choose Mono or Stereo (The default for 3D video is for top/bottom. To change to left/right you will need to edit the function “StereoSphere” in the “panorama_utils.py” module. (Contact worldviz for help with this.)
Media - Add your 360 videos or images to the “resources/media” folder and they will show up in this list to choose from. (Note that for certain video types (including .mp4) you may need to install the K-lite codec pack for the video to play. You can download that at https://codecguide.com/download_kl.htm
-Click “Continue” to save and start the session
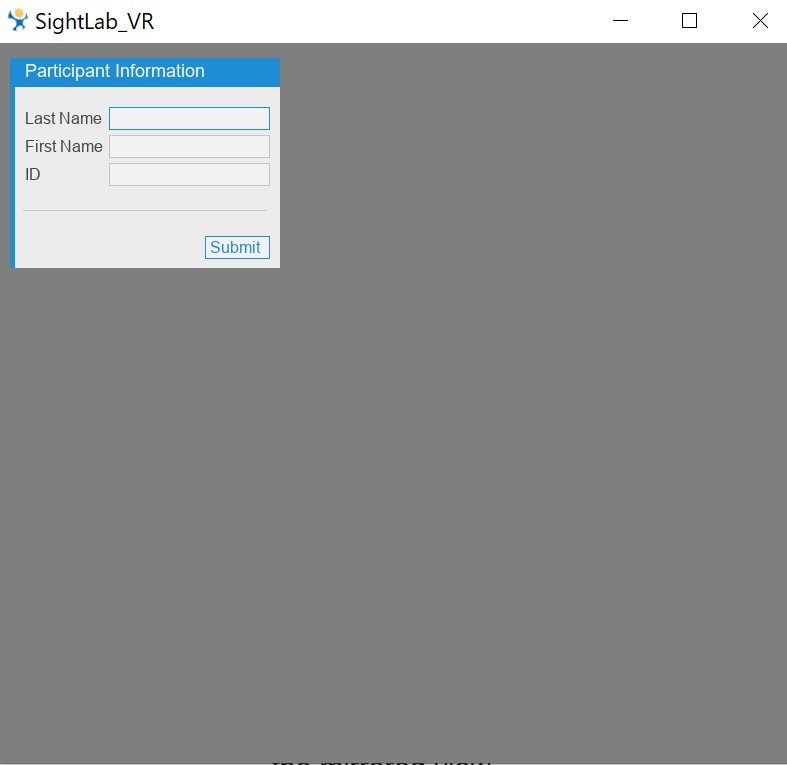
-Enter name and subject ID. The subject ID is used for naming the data files (do not use an underscore in the ID, as this will come up with an error in the replay mode)
-Press spacebar to start recording eye tracking data and view real time fixations
-Use the ‘P’ key to toggle the gazepoint on and off for the participant. It is always on for the mirrored view.
Navigation:
-For SteamVR based headsets use RH Trackpad to teleport and LH Trackpad for smooth locomotion. LH trigger to rotate left and RH trigger to rotate right.
-For Oculus use RH 'B' button to teleport and LH Stick for smooth locomotion
-These can be changed if needed using vizconnect
-Press spacebar to stop recording and see gaze points
-Once “Saved” text appears you can close the script and the data files will be saved
After you quit, you'll see 3 data files saved in the data folder:
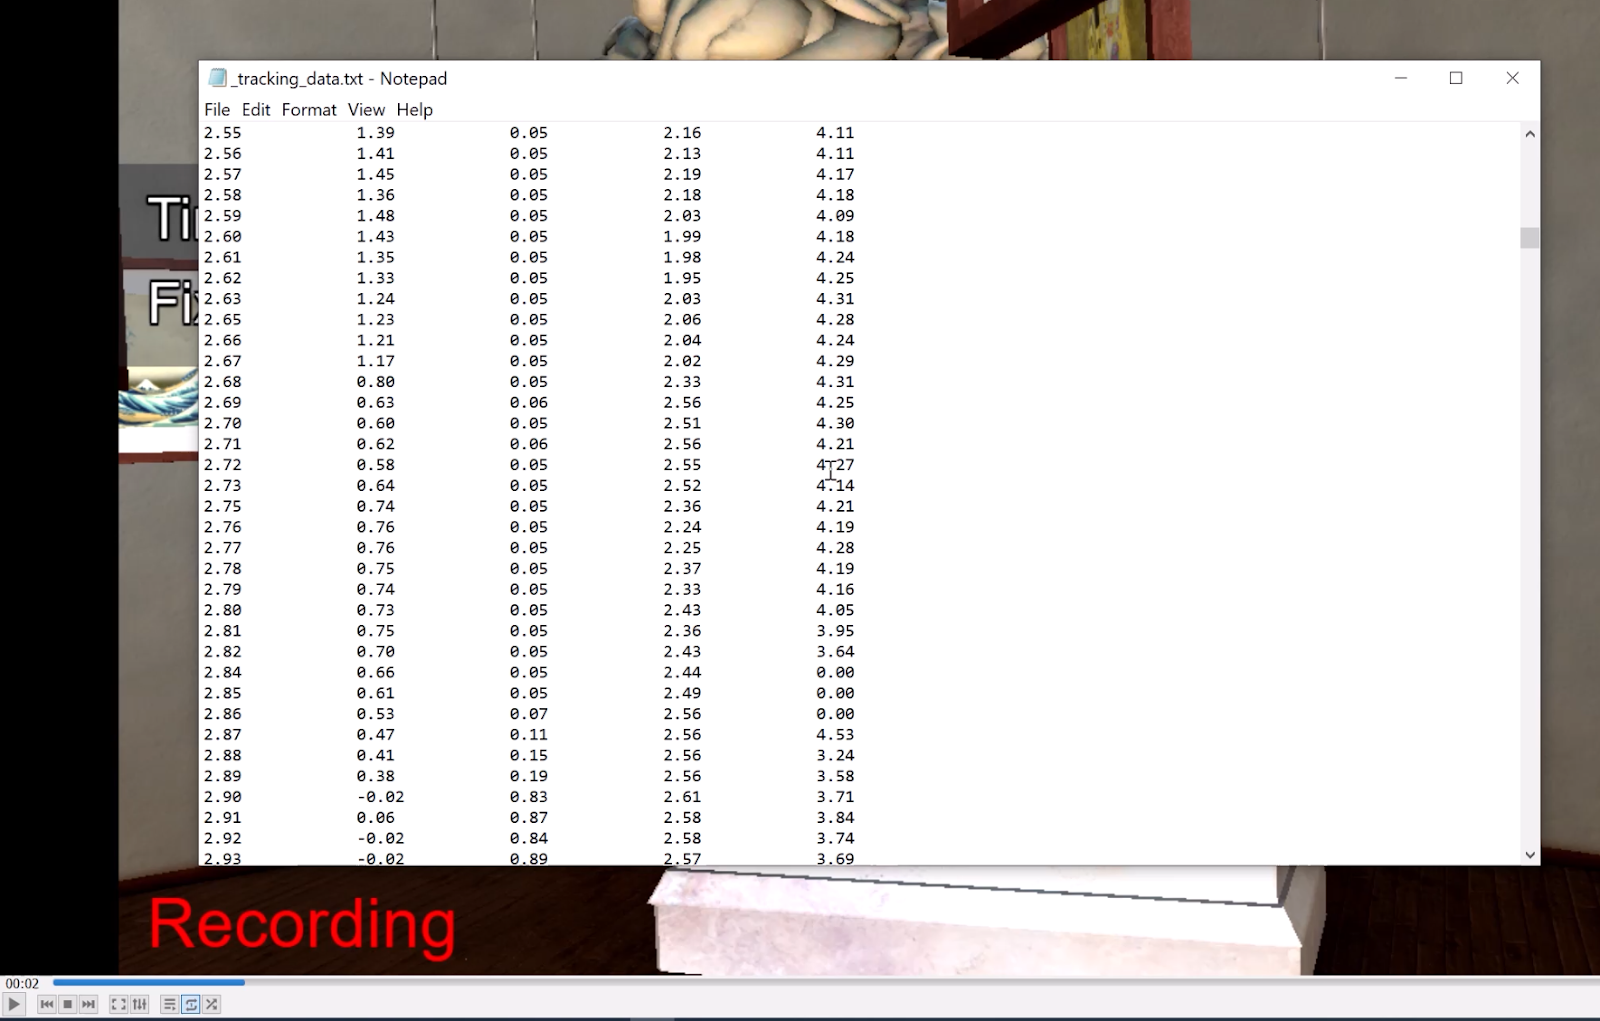
Tracking_data.txt shows a timestamp along with the x,y,z coordinates of the gaze intersect, pupil diameter (if you are using a headset that tracks pupil diameter), and custom flags.
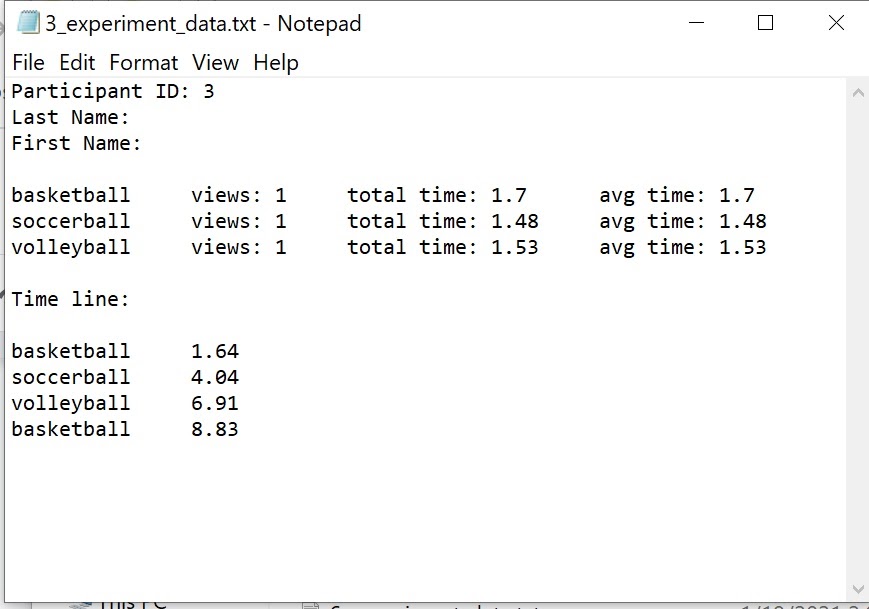
Experiment_data.txt shows a summary of fixations with the number of fixations per object, total fixation time, average fixation time and a timeline of fixations.
Tracking_data_replay.txt This file is used for the session_replay script and you do not need to utilize it.
You can change the extension .txt to .csv if you wish to view the file in a spreadsheet editor. If you enabled recording, a video recording is also saved to the “recordings” folder.
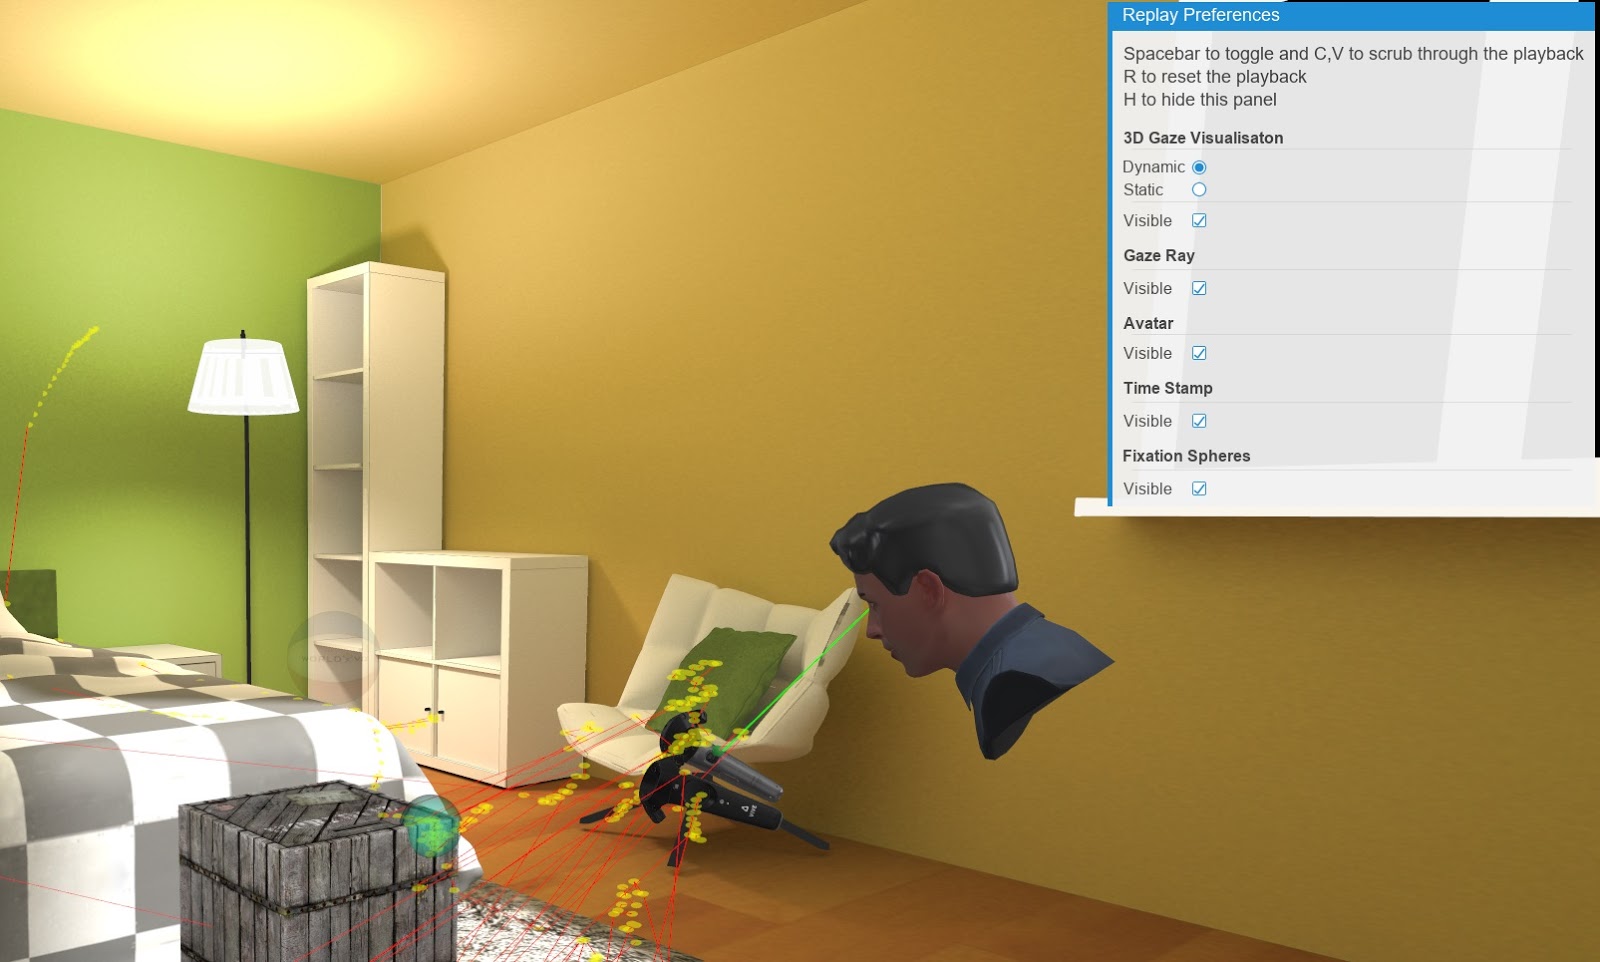
To view the tracking data after a simulation is run, start the session_replay.py file (or replay360 video for 360 videos and images). You will be presented with a list of options for session playback. For 360 video/photo playback, the viewpoint will be from a fixed position.
For more information on SightLab VR visit our website at https://www.worldviz.com/virtual-reality-eye-tracking-for-research-solutions
Or watch the video below: