
Sado Rabaudi
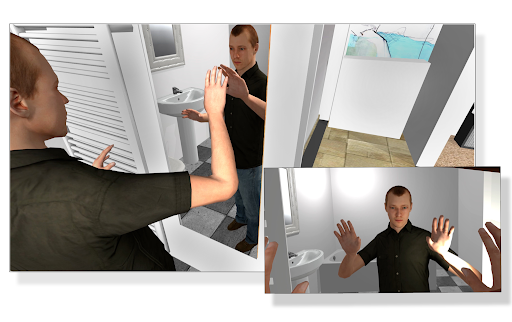
The following tutorial will show you how you can use a reflective quad to create a virtual mirrorusing Vizard. Virtual mirrors have been used in studies such as the Virtual Mirror Demo at Stanford, among others. To see a video clip of this click here (the clip is using Vive Trackers for full body tracking with Vizard’s built in inverse kinematics functionality).
This tutorial is based on an example in the Vizard documentation, called “Planar Reflection”. Check out all the examples of how you can use Vizard in the Examples section.
Here are the steps to create a virtual mirror for your own scene:
1. Download the Mirror.py and mirror_object.osgb files from this link and copy them into your Vizard project folder.
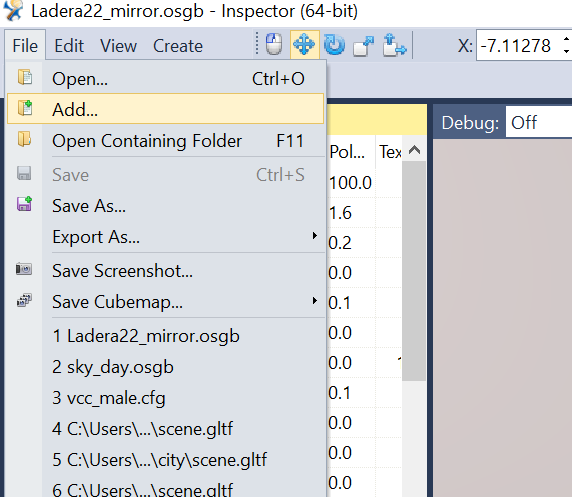
2.Open the model you want to add a mirror to in Vizard’s Inspector by going to Tools-Inspector (if you don’t have a model, see this video for how to add a model from Sketchfab). Make sure the model is saved to your project folder. Choose File-Add and add the mirror_object.osgb.
3. On the left under “Scene Graph” click on the mirror_object.osgb gear icon and then use the “move” translate tool to move the mirror where you want it. You can then use the scale tool or non-uniform scale tool to also change the size to how you want it. Note that rotating the mirror may cause the reflection not to work.
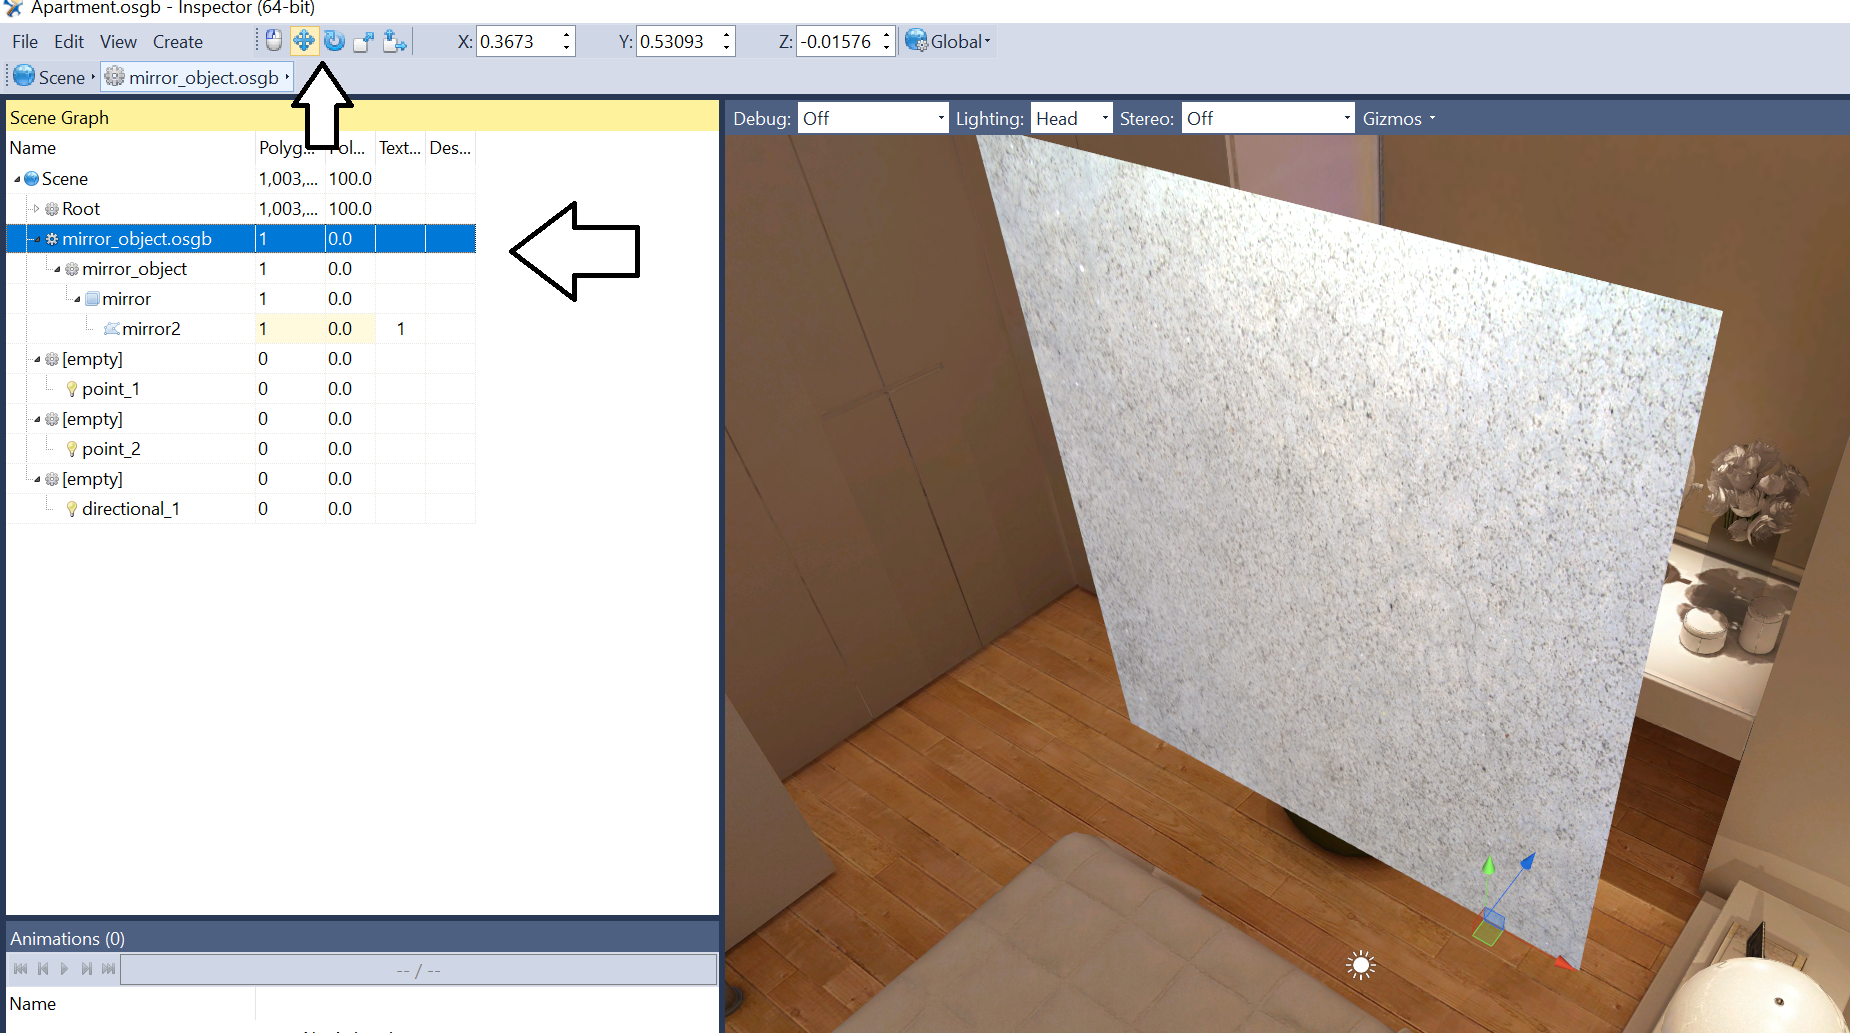
4. Once you have the mirror where you want it and the scale looks correct, make sure to click “Save” to save the changes to your model.
5. If you don’t have a vizconnect hardware configuration saved already, go to Tools-Vizconnect and either choose a preset or “advanced” for more advanced hardware setups. Save this vizconnect file in your project folder and give it a name.
6. Either create a new Vizard script and use the following code, or add this code to your existing Vizard script (where “vizconnect_config.py’ is the name of your vizconnect file and ‘art/House.osgb’ is the name and path to your environment model that you added the mirror to. Also, if you use a different name for your environment than “env”, put that name where it says env.BoundingBox)
And that’s it! Please let us know if you have any questions, and for more information on how WorldViz can help you with setting up your VR lab and experiments contact sales@worldviz.com.